Download the Enterprise Voicemail App
First, download the app in the store of the platform you are using.
The app is available for iOS (from version 10.x) and Android (from version 5.x). Search for "Enterprise Voicemail" or use the following direct links:


First-time login
If you are launching the app for the first time, please perform the following steps once in order to link the app to your Enterprise Voicemail account:
Service Domain
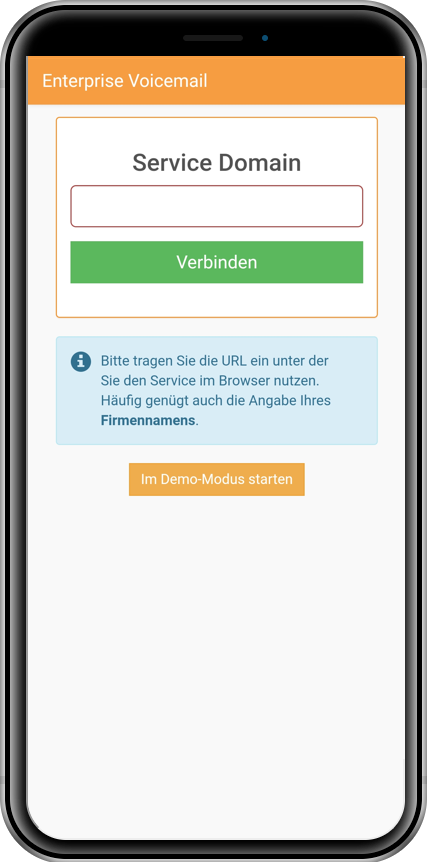
Enter "Your company name" as the Service Domain and then confirm the "Connect" button.
Login
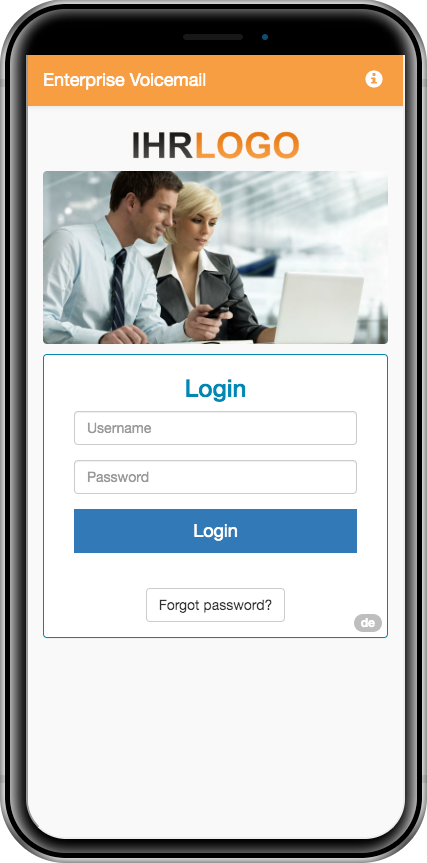
If the link has been successfully established, the login mask will appear with your company logo.
Enter your access data and confirm with "Login".
If you have not yet been assigned a password, please click on the activation link in the email you received to do so.
Complete data
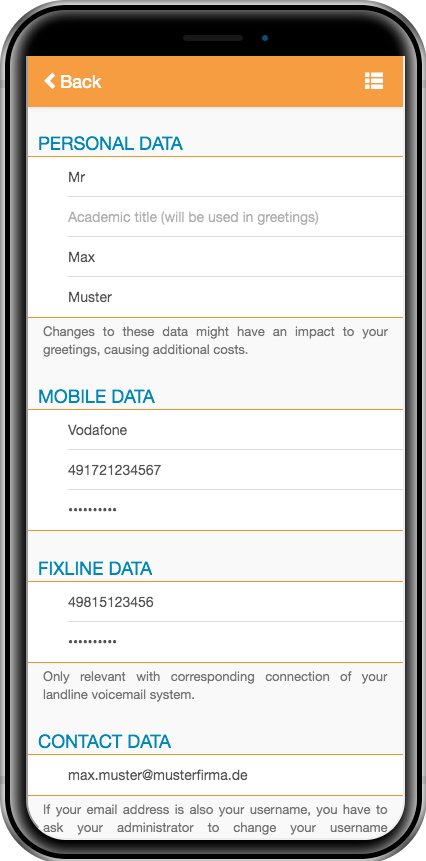
You may need additional data (such as your mailbox PIN) to use the system.
Please fill in the missing fields under "My data" in the main menu.
Your changes will be saved automatically.
Activating a standard announcement
Your default greeting is always active and welcomes callers when you cannot answer the phone.
Select announcement
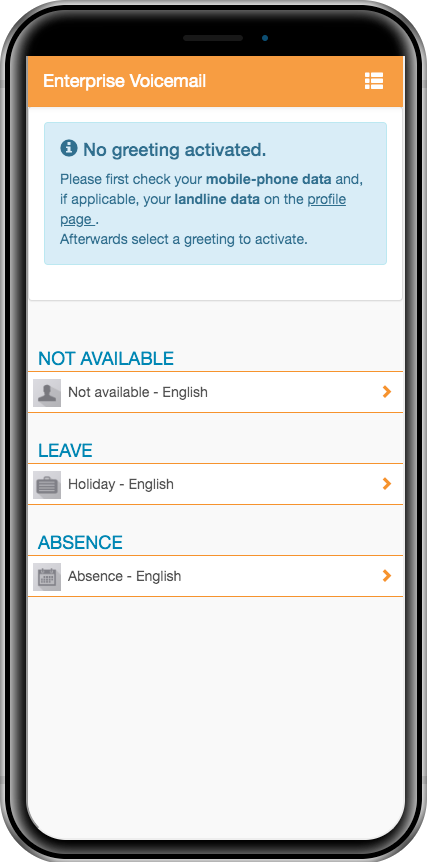
Select the desired announcement from the category "Not available"
Activate
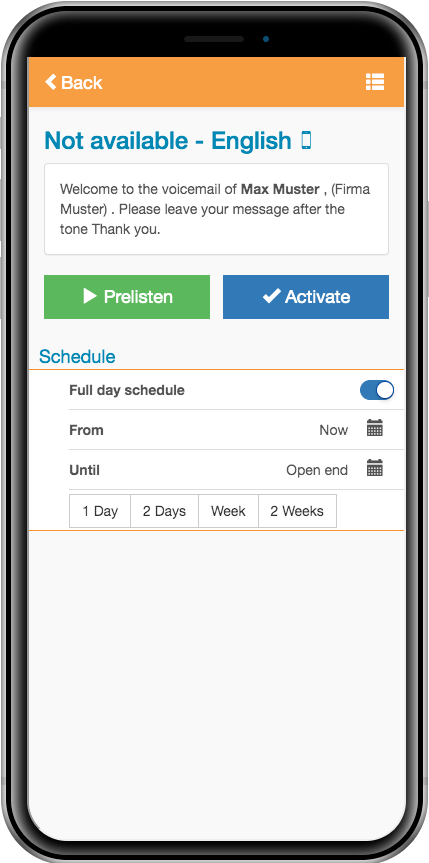
You can listen to the announcement to be activated.
Click on "Activate" to load the announcement to your mailbox.
Confirmation
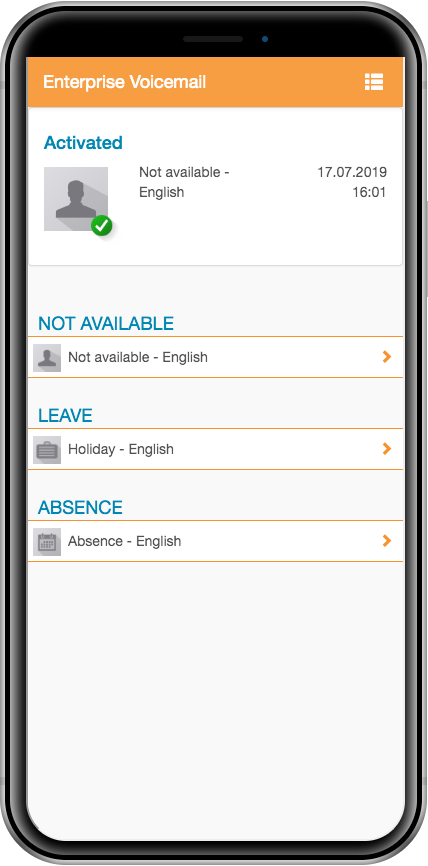
The loading process is visualized in the app. This process can take several minutes.
Successful activation is indicated by a green tick.
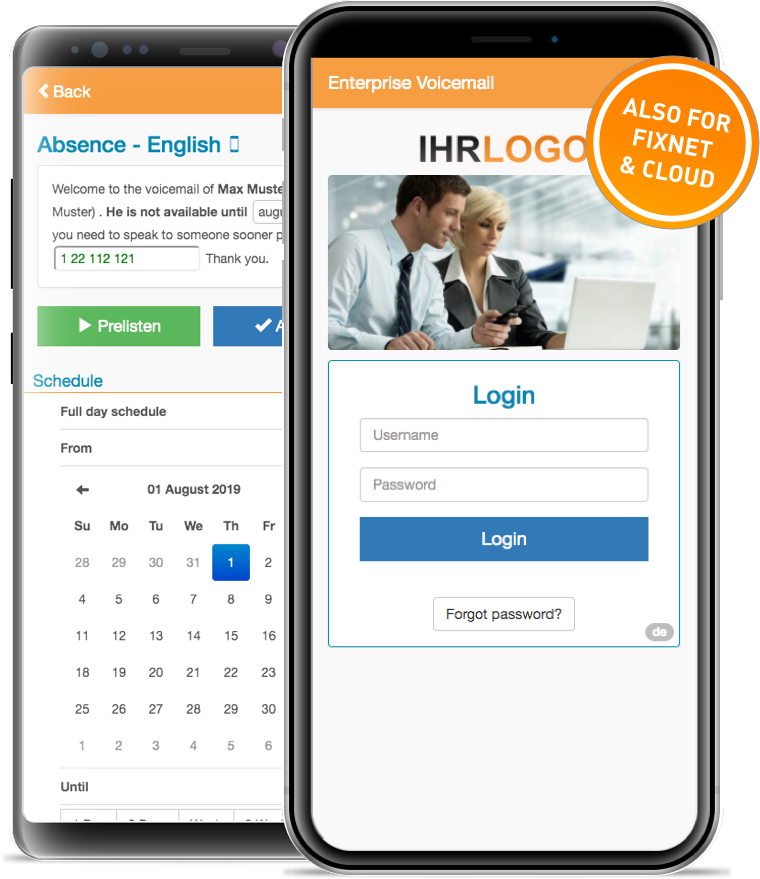
Planning an absence announcement
Your absence announcement can be activated temporarily. It informs callers when you will return and if you have any representatives.
Configure announcement
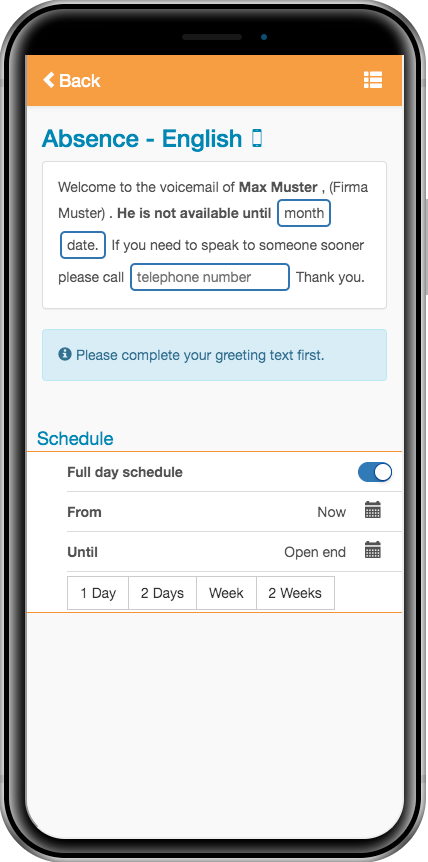
Select the desired announcement from the "Absence" or "Vacation" category and add any missing text elements by selecting an option or entering a phone number.
To do this, tap on the elements with blue edges.
You can listen to the finished announcement before activation.
Plan schedule
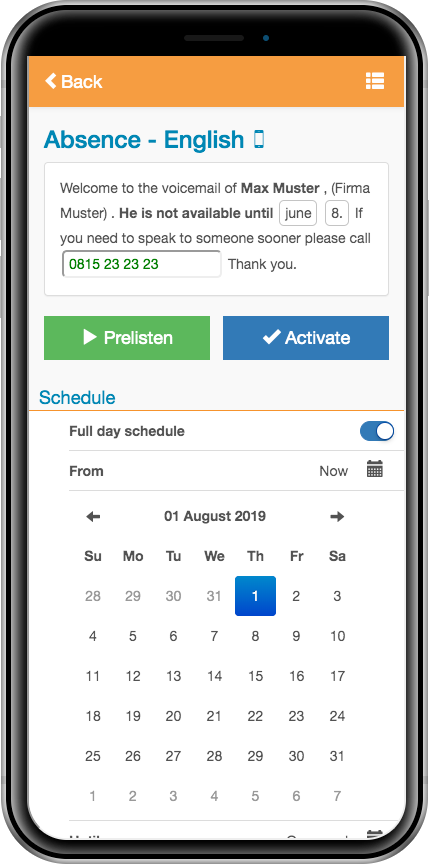
If necessary, select the "start" and "end point" of the planning.
Alternatively, you can plan the announcement for "immediately" or "until further notice".
Save the entry with the "Activate" button.
Schedule overview
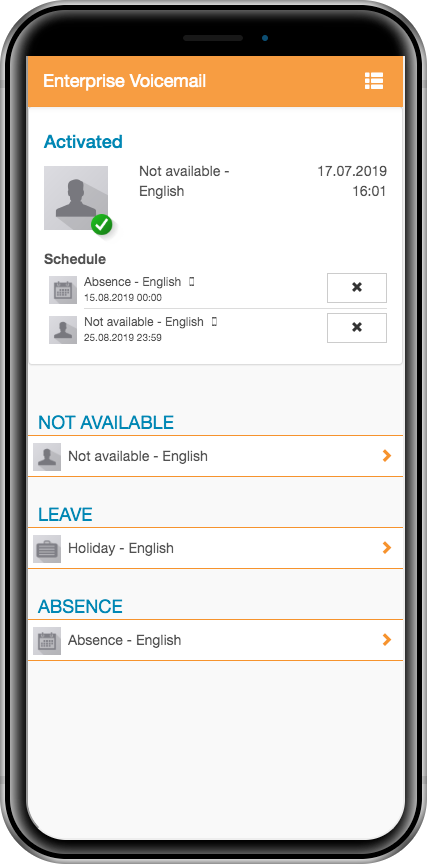
Your scheduled announcement appears in the overview and is automatically activated at the desired time.
The previously active announcement is automatically activated again at the "end" point.
If required, planning can be deleted again with the X button.